I conducted a second shoot using the same equipment and set-up as Shoot 1, with the intention of exploring the effect of colour a little more. I used two speedlights at angles either side of the object, and modified the colour of each with green, red, yellow and blue gels.
The change to the settings I made for these images was to set the camera to custom white balance and adjust that for an image of white card illuminated by both flashes. (The card can be seen in the contacts. The contacts for the shoot are at:
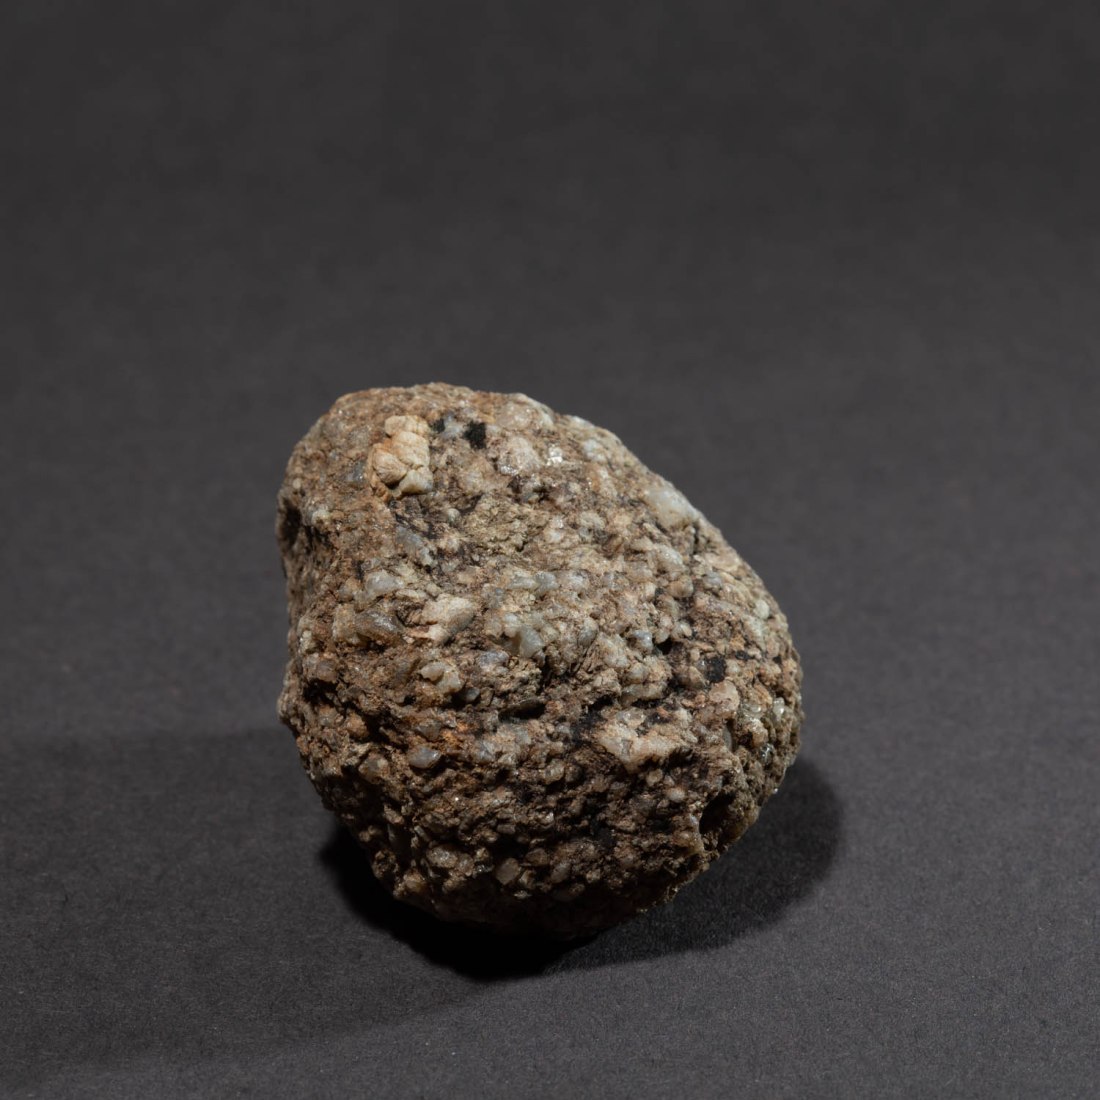
With the custom white balance set, the object illuminated by two flashes without gels shows its “natural” colours.
Ex 4.3 #204
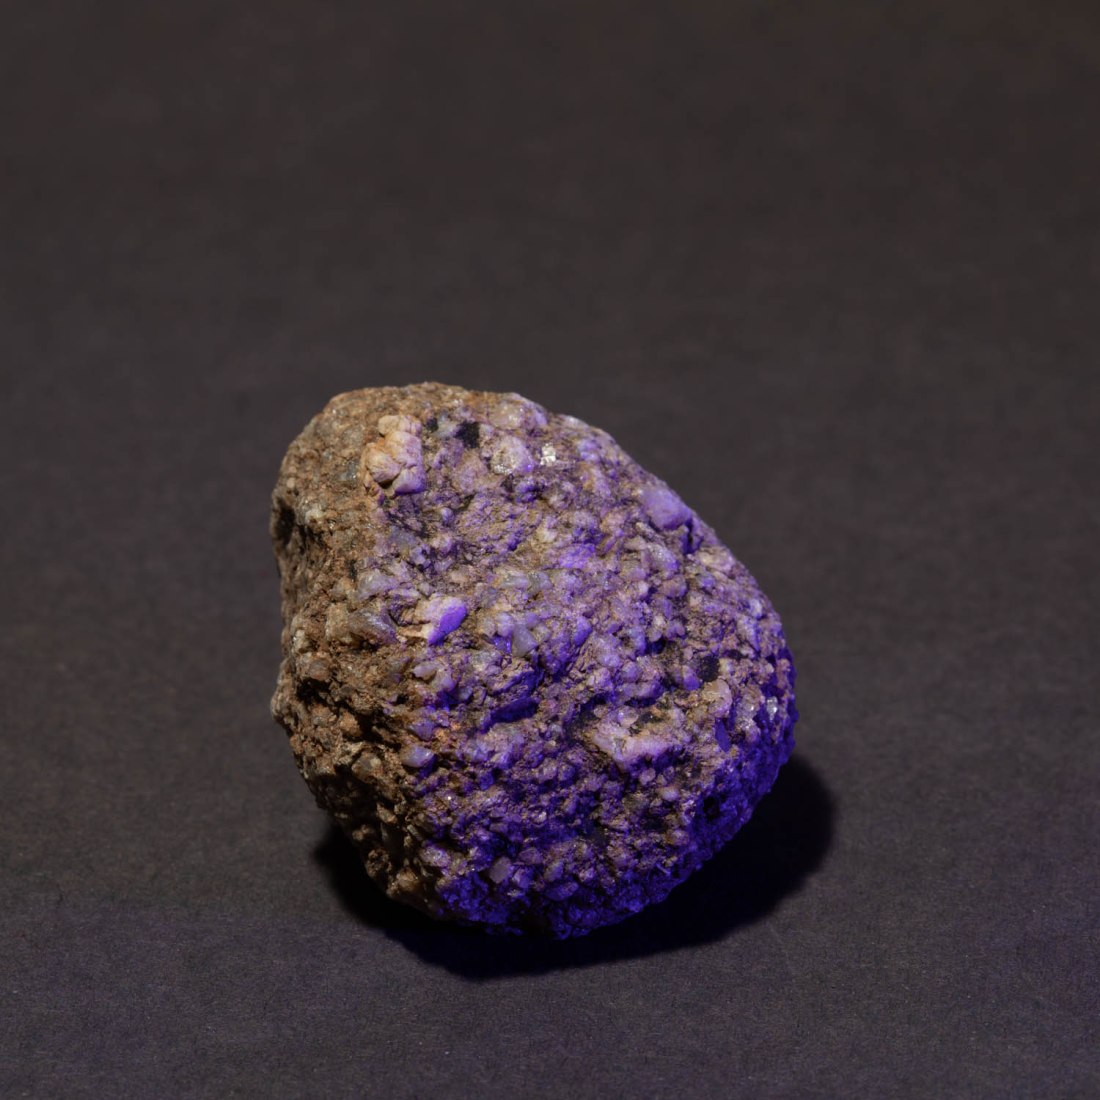
I attempted to mix a white light with a blue and yellow light, using a yellow gel on one, and a blue gel on the other.
Separately these lights give this effect:
Ex 4.3 #208
Ex 4.3 #209
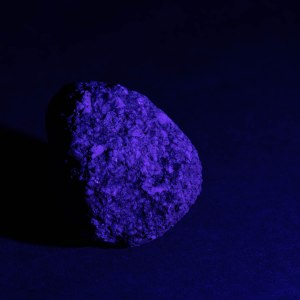
And together, there is a blue shadow to the right, and yellow shadow to the left. The central part of the object, where the lights overlap, is not quite as when shot is a white light, but is more like that than either alone.
Ex 4.3 #211
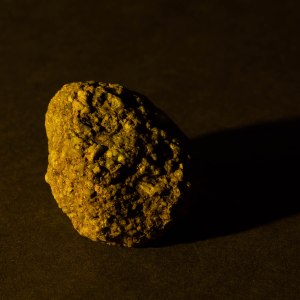
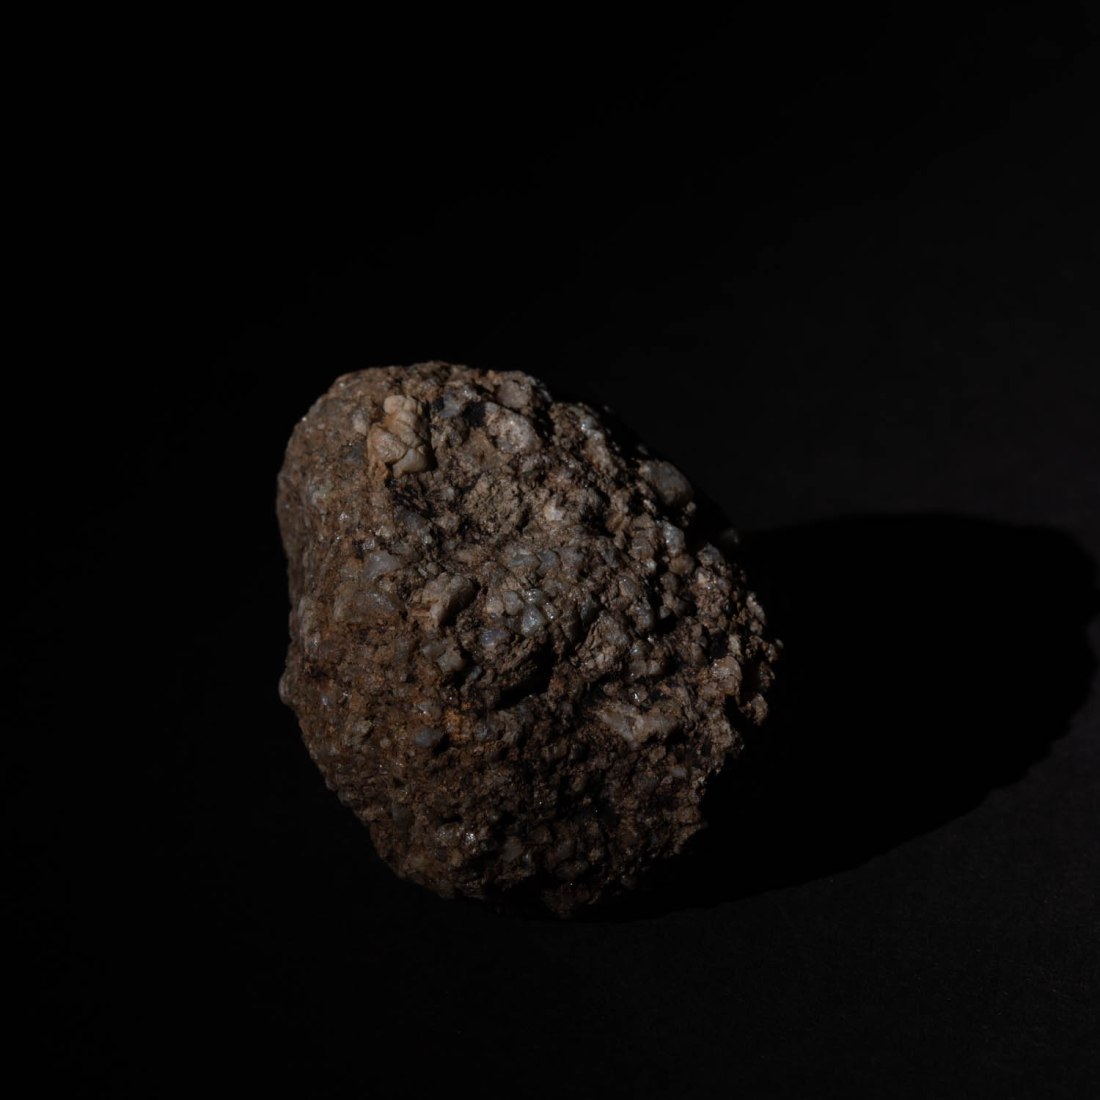
The other image which I think is worth reproducing here is a similar arrangement with green and red light. The contrast between the colours here emphasises the texture of the stone and to me, does add a further dimension to characterising the roughness and granularity.
Ex 4.3 #229
Next steps
Having read the notes for the course and for the later exercises, I am aware that Exercise 5.2 – “Homage” requires me to “Select an image by any photographer of your choice and take a photograph in response to it”.
I have already described the image “Pepper No 30” by Edward Weston found the lighting in this very unusual, rendering the pepper an abstract aspect.
Pepper No. 30, Edward Weston (1930)
I have used the set I have built and the lighting arrangements to photograph a series of peppers in response to Weston’s image and will develop these to form the basis of my images for exercise 5.2.
“Use a combination of quality, contrast, direction and colour to light an object in order to reveal its form. …
The important thing is to aim for four or five unique shots – either change the viewpoint, the subject or the lighting for each shot.
Add the sequence to your learning log. Draw a simple lighting diagram for each of your shots showing the position of the camera, the subject and the direction of the key light and fill.”
Methods
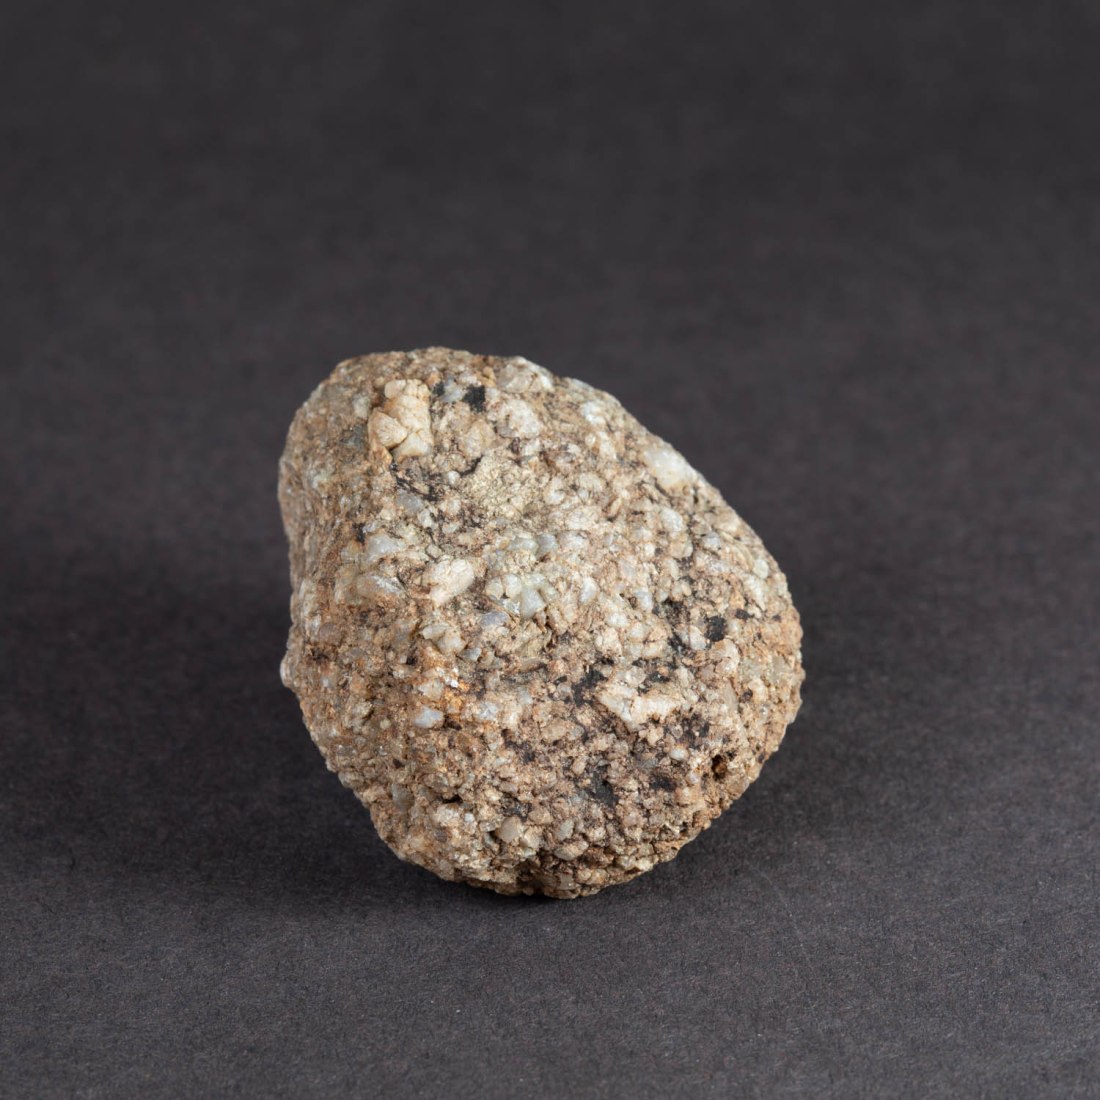
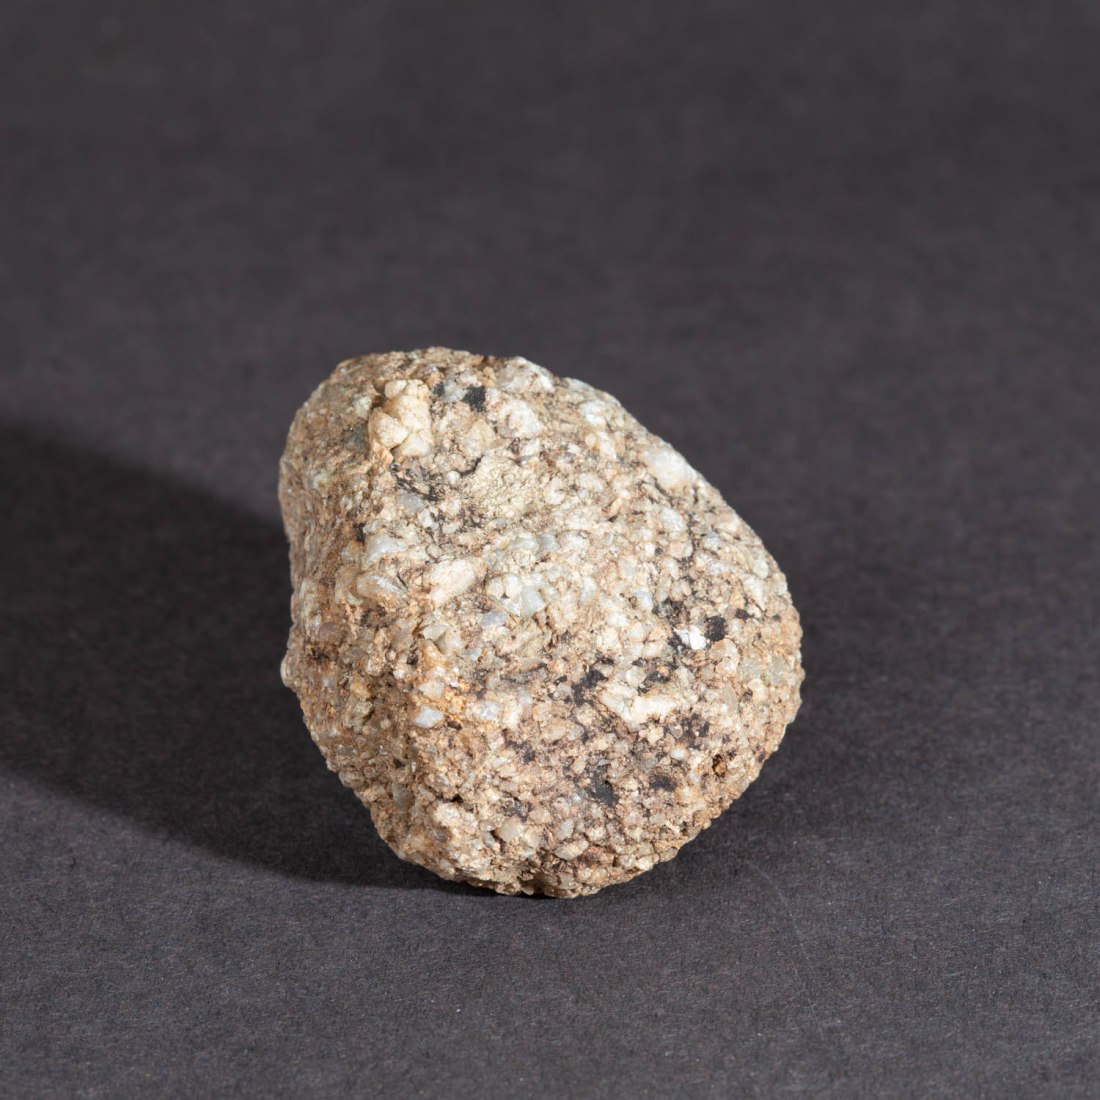
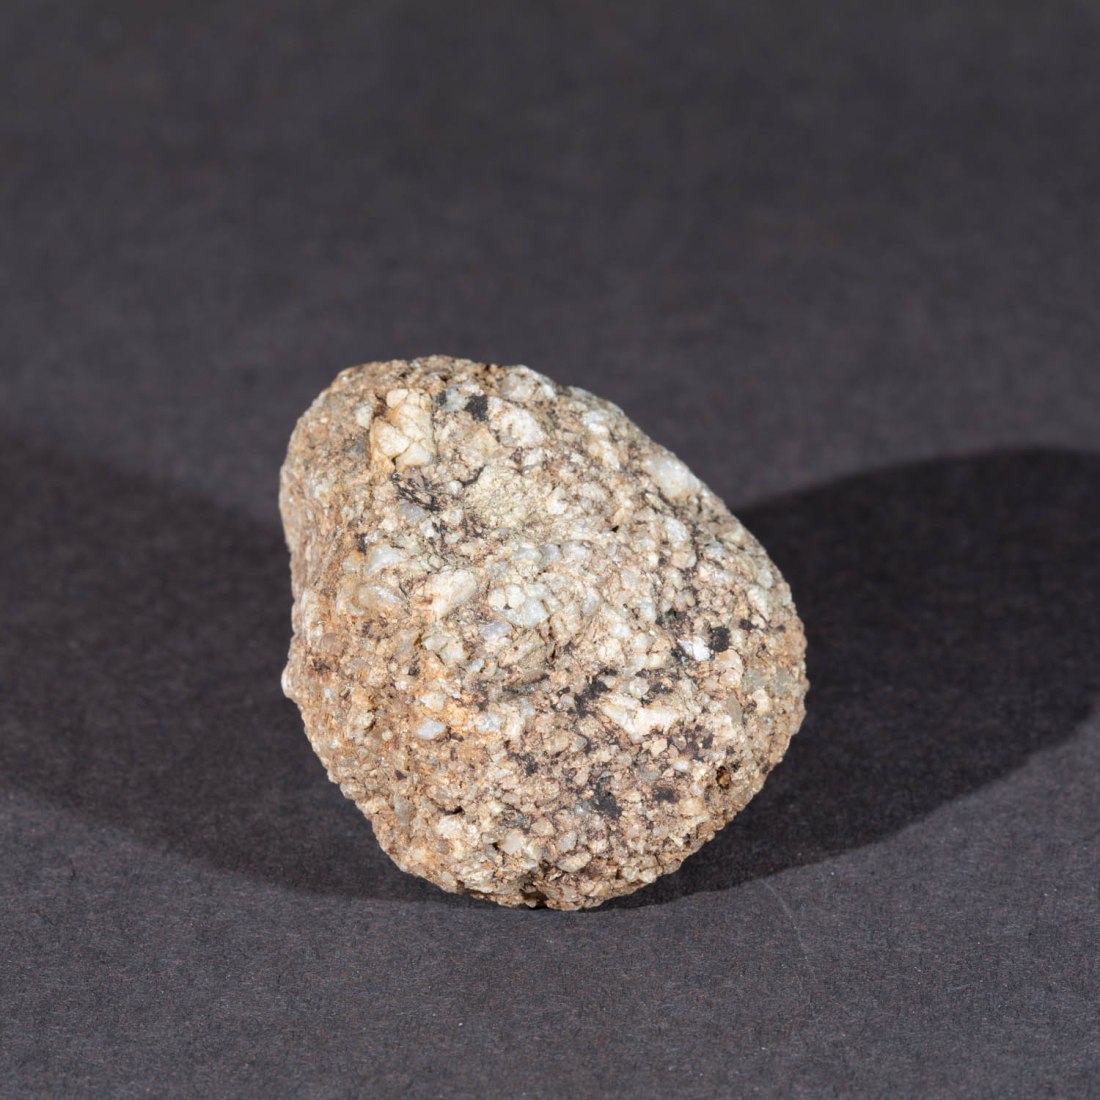
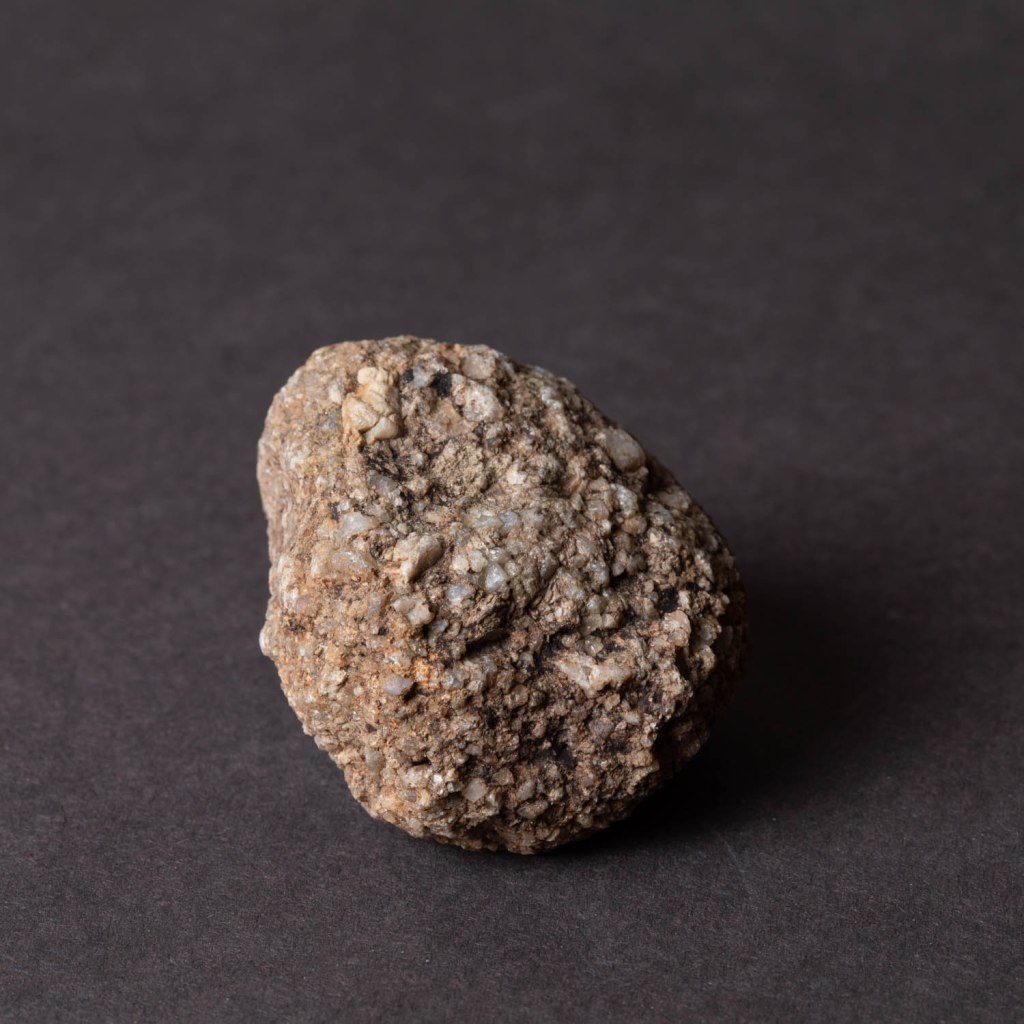
Object:
The object I chose to photograph was a rounded stone, about 120mm along its longest dimension. This stone is from a stream bed on the hills locally and is of the local gritstone. I chose this as the coarse texture of the stone has significance in its previous use for making mill-stones (“Millstone Grit”). In addition the gritstone edges of this area of the Pennines was the site of origin of an expansion in rock-climbing in the UK in the 1950’s. The texture of the rock led to particular style and techniques. It is this texture which I hope to explore in the images.
Equipment
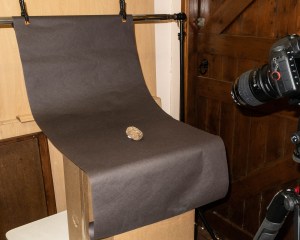
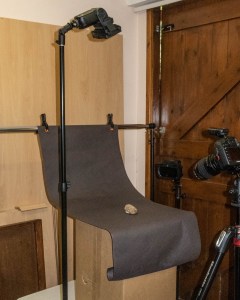
Set: I began by creating a set on which to photograph my object. I have used a background of dark grey paper with a curve to manage the “horizon line” as suggested in the course notes. The positioning of the set allowed me to arrange the lighting around the object. As shown in these images.
Ex 4.3 Studio set 1
Ex 4-3 Studio set – lighting example
Camera etc:
Camera – Canon EOS 5D Mk4
Lens – 100mm macro
Flash – 2 x Nissin Speedlights with radio control and various modifiers including softboxes (700mmx700mm and 200mmx150mm)
Settings:
Manual setting for camera in all shots
Manual control of flash for all shots
ISO 100
Auto white balance for the first series (altered later to custom white balance)
Post-processing
Images were shot in RAW and processed in Lightroom. The only manipulation was cropping to a square format.
Technique
The technique adopted is to have a camera setting which results in a black image by the ambient light, without flash. In this way I can then increase the intensity of the flash to create the image and have complete control of the light sources producing the image.
The first series of images I took were all with one camera position with a lens to object distance 400mm
To try and create a very soft light from large light sources, I used two flashes at either side of the object both fitted with softboxes. The following is from my notebook made at the time:
This resulted in an image in which the visible part of the stone is almost uniformly illuminated. The coarse texture of the stone is apparent only because of the alteration in colouration. The overall shape of the stone is not apparent as there is very little shading of any part of it.
Ex 4.3 #22
Removing the softbox from the flash to the right of the object (as viewed from the camera position) results in a stronger shadow to the left side and the left side of the stone is now in shadow.
However the right side of the stone lacks more detail and seems harshly lit.
Ex 4.3 #25
Removing both soft boxes now causes the object to cast a hard shadow with well demarcated edges on the background to both sides.
Ex 4.3 #27
When only one light without softbox is used to the left of the object a hard deep shadow is cast to the right. This hard shadow is also seen on the surface of the object, throwing the granulations into stark contrast. (Image 30). With the same position of lighting and adding the large softbox, the sharpness of these shadows is reduced (Image 28) and detail in the shaded side of the stone can be seen.
Ex 4.3 #30
Ex 4.3 #28
Direction
Putting one of the lights directly over the object causes a different appearance, with the main shadow falling below the object and the granulations of the surface being less clearly defined.
Ex 4.3 #45
The light was directed to a restricted area of the subject and this enhanced the demarcation from the background.
Ex 4.3 #35
Colour
In all these images I have set the white balance to “Auto White Balance”. I made a few images putting coloured gels in front of the flash, but realised this may be a mistake, as the white balance setting will aim to correct a colour cast and adjust the entire image to an average as if illuminated by white light.
I will repeat this exercise with a custom white balance.
However, the images I did create just show a colour cast to the object – although adding a magenta gel to the flash to the right, does create a colour contrast between the sides of the object.
Ex 4.3 #50
While this is an interesting effect, I am not sure it adds anything to my understanding of the stone.
This project is about the use of studio lighting and the course notes refer to four aspects of lighting under the control of the photographer:
Quality
Contrast
Direction
Colour
The notes elaborate on some of this.
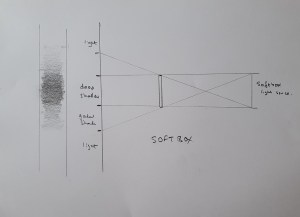
Quality
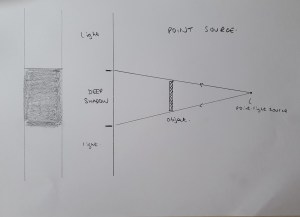
“at its most basic it can be described as the simple distinction between hard and soft light”
This is defined as whether the light casts hard or soft shadows, and in turn is controlled by the size of the light source relative to the subject.
I have thought a little about this and the diagrams below help me understand how this is. A small point light source is hidden from a large area behind the object – the shadow and the margins of the shadow are well demarcated. However a large light source, like a softbox casts a light across its entire length. Thus there will be an area of the shadow which is illuminated by increasingly greater amount of the light source, and the edge of the shadow area is therefore diffuse.
Point light source
Softbox illumination
The notes refer me to the work of Jean-Baptiste Huynh. On his website (Jean Baptiste Huynh – Site officiel, s.d.) are examples of images created in the studio, illuminated by soft lighting. He has applied this technique to a range of subjects – plants, insects, parts of the body, nudes and portraiture. He also uses colour and monochrome for this.
In my reading about studio lighting for still life, I used a recommended textbook (Diprose and Robins, 2012), which in turn referred me to the work of Edward Weston and in particular his image Pepper No. 30. This image was apparently lit by placing it in a metal funnel, ((Weston and Newhall, 1961) as cited in (Wikipedia contributors, 2019)). It is this technique which results in the characteristic lighting effect.
Pepper No. 30, Edward Weston (1930)
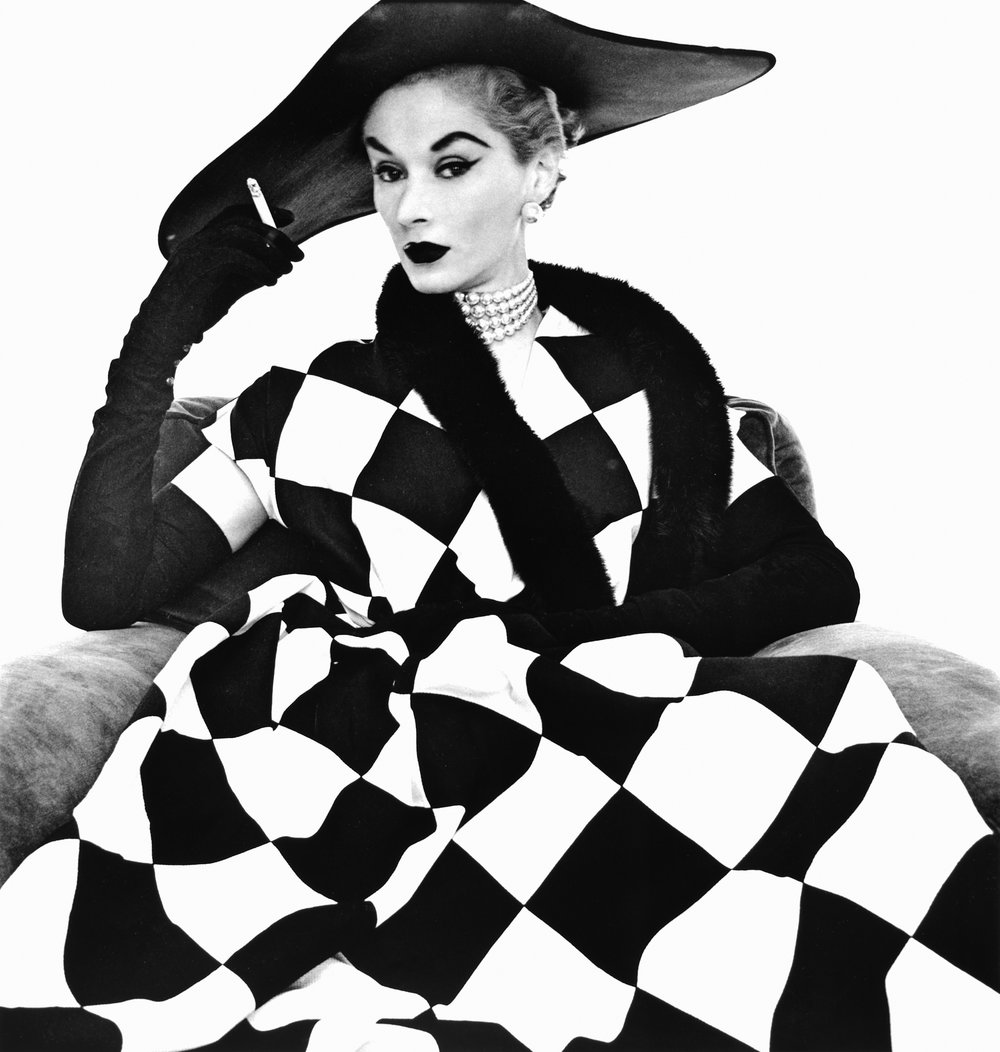
The other artist referred to in the course notes is Irving Penn. The notes refer to his work illuminated by the light of a skylight only. Briefly researching his work I have learned that he was noted as one of Vogue magazine’s top photographers. His biography on website of The Irving Penn Foundation (The Irving Penn Foundation, s.d.) indicates that he developed a preference for “photographing in the controlled environment of a studio” although this was not for the management of the lighting but “where he could trim away anything that was not essential to his compositions and hone in on his subjects”.
That website also refers to him in 1950 photographing the haute couture collections in Paris for Vogue. Then he “worked in a daylight studio with an old theater curtain as a backdrop”. One of the images from that time is this one, presumably shot by daylight.
Harlequin dress (Model Lisa Fonssagrives); Irving Penn 1950
However I note that the model’s face is very evenly lit, in spite of being under the brim of a large hat. Creating an even lighting in those conditions with a light source from one direction presumably has required the use of extensive reflectors.
The other aspects of the lighting the notes suggest I consider are
Contrast
This is the difference in illumination between the shadows and highlights and depends on variable lighting to illuminate the shadows.
Direction
The direction of the light determines the direction of the shadows and this can significantly alter the appearance of the subject.
Colour
The colour of the light can be altered – either directly or by the use of coloured reflectors. I have previously referred to a workshop I did on the use of speedlights for studio lighting. In this I used coloured light sources to alter the background for the subject. This is an example.
Speedlight Workshop #138
My plan for the next exercise is to build on that workshop and do the exercise with speedlight flashes, reflectors and coloured gels. In this way I should be able to alter the four parameters suggested.
References
References to the works cited in this post are found in my separate post “References”